
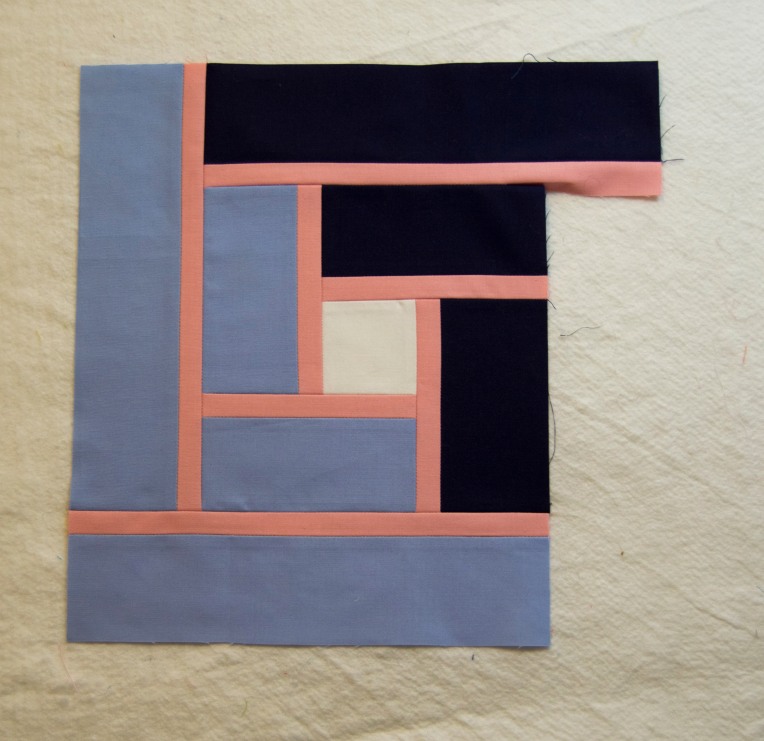
Hi! And welcome to my stop on the PaintBrush Studio Blog Hop!!! I’ve designed a 12.5″ block to share with you today:

There’s a few options when you get a finished quilt layout, but first let’s start with how to make it!
You will need:

(2) 2.5″ x at least 15″ strips of one color (light blue)
(2) 2.5″ x at least 15″ strips of another color (navy blue)
(4) 1″ x at least 15″ strips of contrasting color (pink)
(1) 2.5″ x 2.5″ square (white)
Sew a pink strip to each one of the blue strips. This will make it easier to sew the skinny strips.
Cut each strip into a 5″ long piece and a 10″ long piece. You will need two of each size, per color.

Now here is where it gets a little trickier: Partial Seams. Dunh dunh dunh. They aren’t that bad, I promise. These are really, really easy ones.
First, you just line up one of the dark blue pieces with the white center square, and sew most of the way down.

Press the seam open, and sew on the next piece.

And the next piece. 
Now with the next piece, you want to make sure you don’t catch the piece that’s hanging down. Pin the next piece in place, and sew.
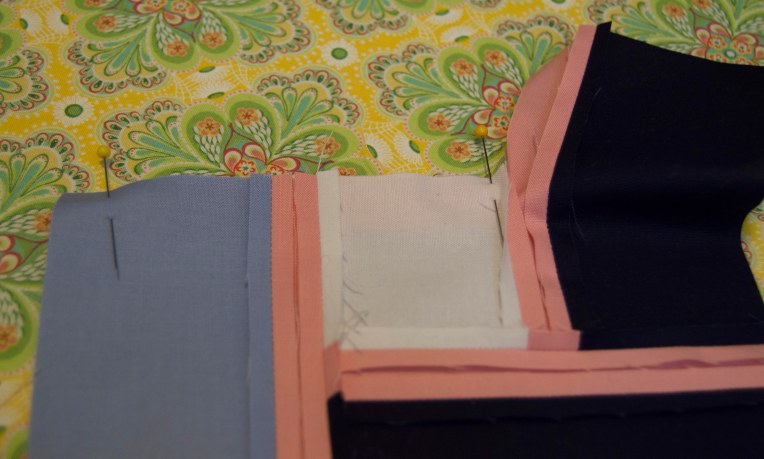
Now it’s time to finish the partial seam. All you have to do is line up the half sewn piece with the edge of the piece you just sewed. Unfortunately, this is hard to photograph, but it’ll make sense when you get here.

You have now finished the middle of the block! For the rest of the block you just do all the same steps, sewing each piece around the middle. Starting with the first strip, only sew most of the seam.

Pressing the seams open as you go, sew the other three strips onto the middle.
And then sew the last strip on, then finish the partial seam.

Tada! You have a completed block!
Now, there’s a few things you can do with this block…
You can sash multiple blocks with 1″ strips and get something like this.

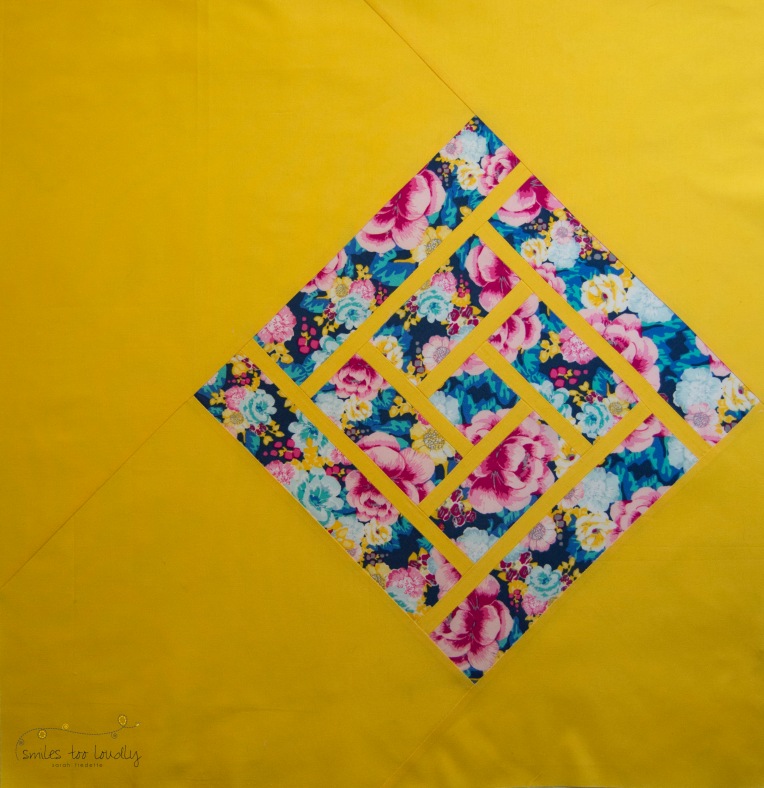
Or, you can choose a nice big floral, a coordinating solid and get something like this:
I cannot wait to see what you come up with!!!
There are so many other gorgeous block tutorials being posted this week — Today’s offerings are:
Host: Cheryl @Meadow Mist Designs
Kim @Leland Ave Studios
Andrea @The Sewing Fools
Cassandra @The (not so) Dramatic Life
Stephanie @Quilt’n Party
Irene @Patchwork and Pastry
Tish @Tish’s Adventures in Wonderland
Abby @Hashtag Quilt
Sarah @Smiles Too Loudly
Carrie @The Zen Quilter
Wanda @Wanda’s Life Sampler
Jayne @Twiggy and Opal

I LOVE this! I love all the possibilities of playing with negative space using those 1″ strips! Awesome job!!!
Wow, that yellow and floral combination knocks my socks off! I love that you used partial seams and I feel like I need to go try this block now… Thanks for joining the hop!
When I first looked at the top block I couldn’t for the life of me figure out how it was a log cabin until I scrolled down and saw the words “partial seams.” Then the lightbulb went off! This is such a simplistic block but is so awesome. I love the quilt layout you showed. It looks so modern with lots of options for negative space quilting. Doing it as an individual/mini is also pretty sweet.
I really like the quilt you made with this block, shown in blue, white and black. Thanks for sharing!
So many possibilities. Great block!
Sarah, I’ve always wanted to make some of these beautiful blocks. Thanks so much for the great directions!
This is my favorite block today!
This is a great block. I love the Golden and Floral version. What a statement that makes.
So cool. I like how the yellow in the floral version blends into the background. So strange how you chose to use yellow and had plenty lying around… 😀
I love what you can do with this block. Using it with negative space is such a great idea.
Very cool design!! I love it rendered into a full quilt!
OoOooh very cool layout for this block! I’ve seen a similar technique using black as the dividing color and saturated colors for the other areas for a stained glass effect. But that big floral one! Man that is cool.
Great block and great tutorial!!
Wow, I love this block! Thanks for sharing.
I love log cabin variations, and this one is fantastic! I particularly like the layout you developed, and it is great to see the block in additional color schemes.
Great block, and I love that you included some ideas for quilt layouts. And that floral with the yellow is just killing me! (In a good way.)
This is a very nice block. I love the first layout…but those flowers are pretty awesome as well.
I’m loving how this block looks with the sashing the same color as the background! Partial seams are totally a “dun dun dun….” moment but I’ve done them a couple times before and just like y-seams, as long as I think about what I’m doing, while I’m doing it, it’s not too bad!
Definitely going to make one of these! How big is the finished block?